REGISTRATION & STUDENTS | Student Management |
1. Click REGISTRATION or STUDENTS/Student Management.
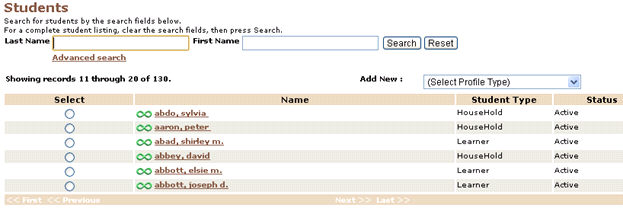
2. A list of students is displayed. If you need to search for a particular student you can use their First or Last Name.
3. Otherwise, find the name from the list and click on the radio button given beside it. It displays the drop-down box.
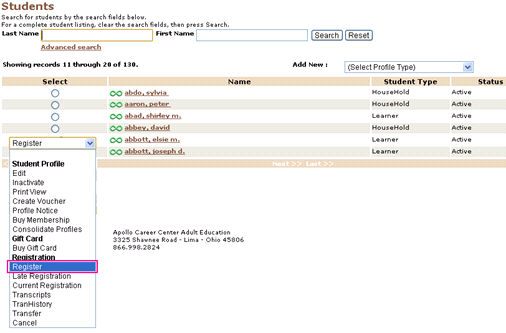
4. Select Register from the list.
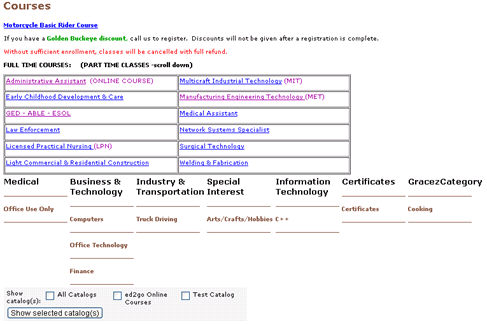
5. It displays the Courses screen. Select a category.
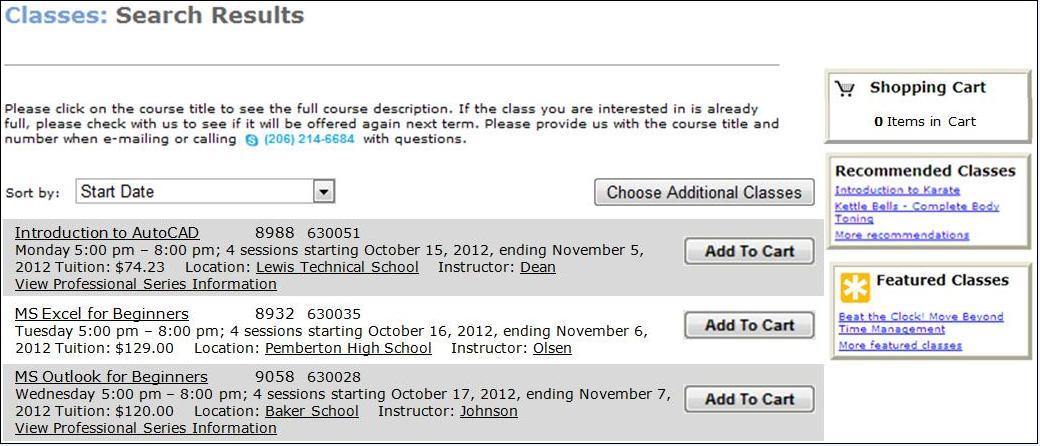
6. This opens the list of classes to select. Click on the Add to Cart button given against the class.
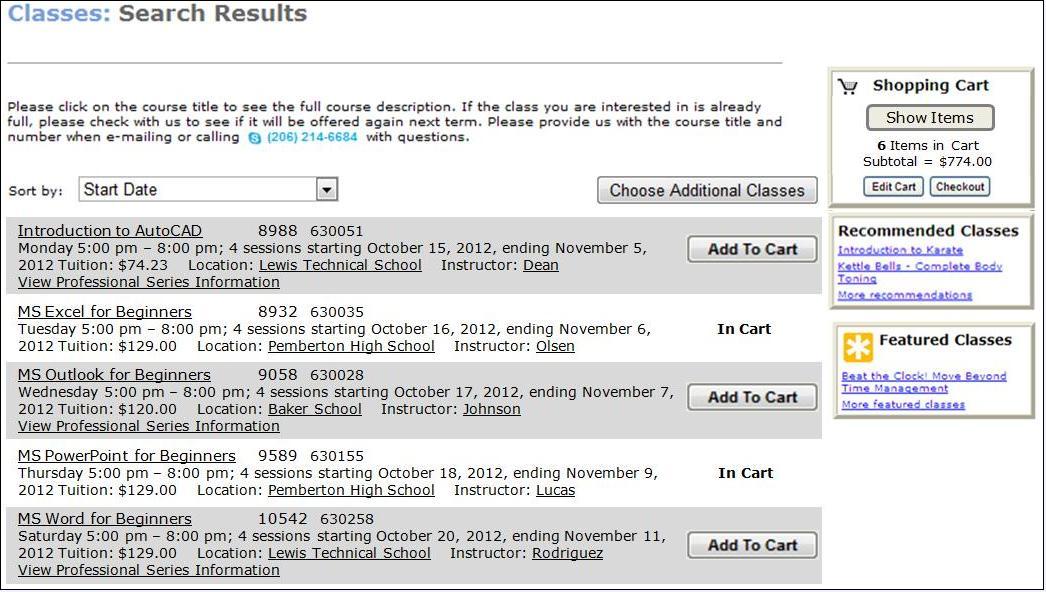
7. This will add the class to the cart. You can see the update in the Shopping Cart section.
8. Click on Checkout in the shopping cart section.
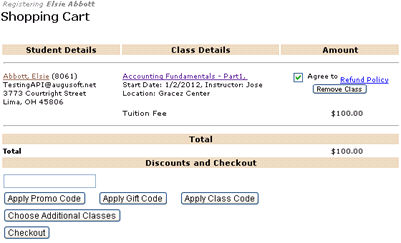
9. Click on Checkout again.
10. This displays the Home:Cart:Choose Payment Method screen. Select the mode of payment and click on Continue
Checkout.
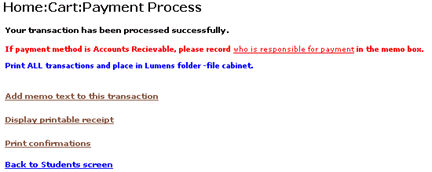
11. This displays the confirmation page.
|
|
Note: If the student is already registered for this class, the check box will be filled with a colored square. A key to the meaning of each check box is located at the top of the screen.
Important: Appears for classes that have text typed into the special notice field. |
|
|
Note:
|
Registering for Multiple Students
1. If the class allows quantity registrations you will be asked to submit a quantity (total number of registrations for the class) in the
field while adding the class to the cart. The default number is 1.
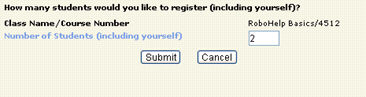
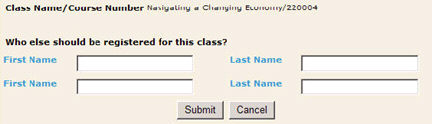
2. If you submitted a quantity greater than 1, and the Feature Configuration have been set to require additional names for
quantity registrations, you will be asked to provide the additional names for the quantity registration. If the registrant is part of a
multiple membership, you will first be asked to check the names of other members attending the class.
3. If you have chosen a student that is part of a membership, or a household account, you will be asked which student you want to
register. If the class allows quantity registrations, you may select more than one member to be registered for the class.

4. If you have set up an age restriction for a class, and the student you wish to register for the class is either too old or too young
for the class, you will be prompted to override the age restriction.
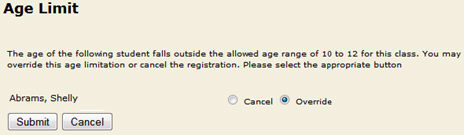
5. Click Cancel if you do not wish to register this student for the class, or click Override if you wish to register the student.
|
|
Note: A user that is self-registering sees a course/class display that is different from the staff class display. Only staff users can process a registration for a class that is full or whose registration is closed. It is at the discretion of staff to decide how many seats they wish to over book in a class. If you wish to over book a class, please see Waiting List, below, for more information on registering a student for a full class. A staff member can register a student for a class until the class has finished. If a staff member wishes to register a student for a class that has already run, the staff member must do so using the Late registration feature, see below for more information.
Self-registrations will not be accepted for classes that have begun or whose registration has closed. Classes that have begun are also marked with colored boxes in place of the usual checkbox on the students’ course catalog display. |