ROOM MANAGEMENT | locations

Locations

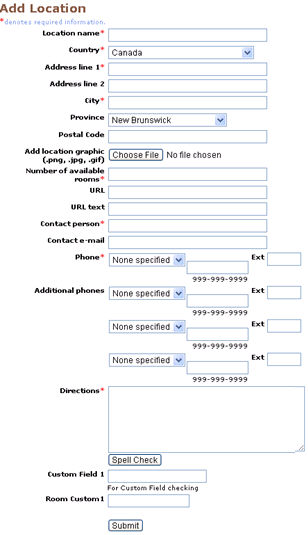
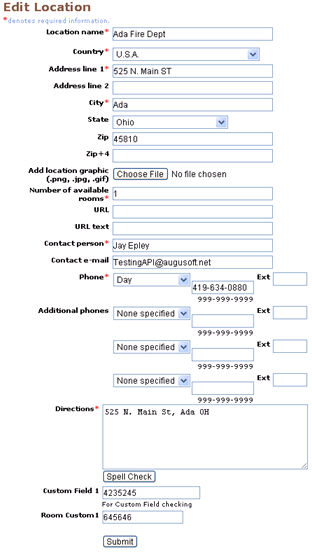
To add or edit a location:


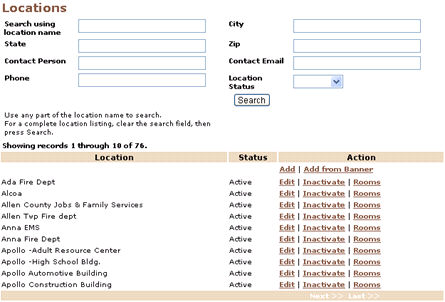
     1.  Click ROOM MANAGEMENT/locations.


  1. You can search for a particular location using the parameters like, Location Name, State, City, Zip, Contact Person, Contact E-mail,       Phone Number or Location Status.


     3.  Review the list of defined locations. Click Add to add a new location; or click the Edit action link next to the location you want to change.


Screen Steps


  • Enter a name of up to 50 characters in the Location name field.

  • Enter data in all address fields.

  • Add a graphic to the location by clicking Browse next to the Add location graphic field and opening a graphic file of 50K or less. This graphic will appear when you edit the location.

  • Enter a number in the Number of available rooms field.

  • Enter a URL in the URL field.

  • Enter the text that will represent the URL in the URL text field.

  • Enter the name of the person who represents the location in the Contact person field.

  • Enter the contact person's e-mail address in the Contact e-mail field.

  • Enter the contact person's phone numbers in all applicable phone number fields.

  • Enter directions on how to reach the location in the Directions field.  This field can be a maximum of 1500 characters long.  The Directions field appears in the student class confirmations and in a popup window linked from a class listing in the online catalog.  

  • Click Spell Check to ensure the text is correct.


  1. Click Submit.


Note: Searching for locations using the Search function will also return those with "inactive" status.  There is an option to reactivate these, after which all their data and history will be restored.

Note: All Locations features and values are available to Lumens Pro and Workforce customers.

Note: Accounting codes may be used to track receipts by location.