REGISTRATION-Companies | FINANCIAL MANAGEMENT-A/R Management |
Charges are the first step in the financial process. There are several action items to take for the collection of these charges including sending the vendor an invoice. If you choose an invoice or credit memo, you have to create a template first. When this is complete, you will be able to use the template and customize each invoice, which is discussed in this section.
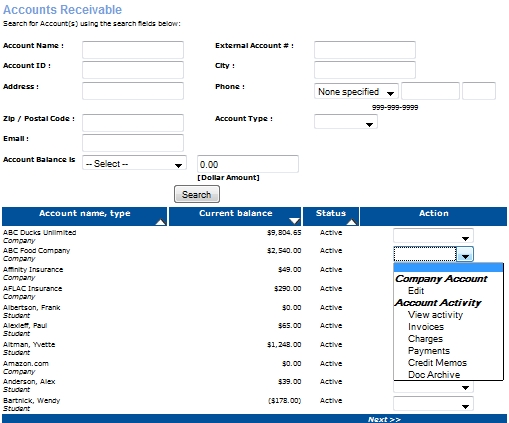
Click Financial Management, A/R Account.
Click Search.
Click Charges from the drop-down arrow next to the account name of your choosing.
The main screen shows multiple accounts and by using the search fields or choosing an action item, it narrows the search to a single account. Two places to access the Charge accounts: Click on View at the top of the screen or click Charges from the drop-down arrow in the action text box.
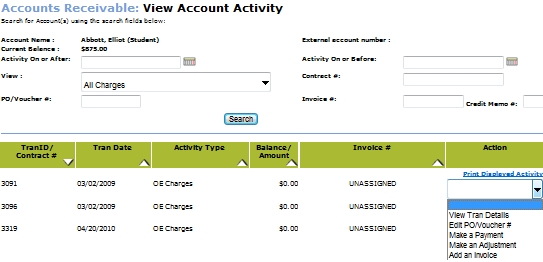
This option displays the date, ID, Class listings, cost of class, and the payment method used in the transaction. A similar screen will appear like the one below.
![]()
In some cases, the staff member will not have the PO/Voucher number at the time of registration. Rather than cancel the enrollment, this method allows the staff member to continue with the registration and go back into the system at a later time to edit or enter a PO/Voucher number.

A payment can be made with or without the vehicle of an invoice. When checks are received in the mail or access to a credit card is used to make a payment transaction, this is how the transaction process works in Lumens.
Are all transactions going to be listed to match the current balance on screen?
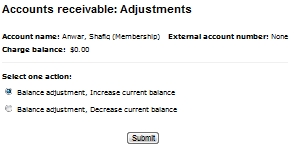
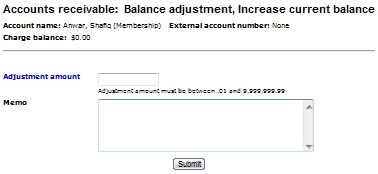
The Adjustment feature is for those incidental charges and credits that show up. An example of adjustments might come in the form of an interest fee charge if funds were not received by a certain date, therefore a charge would be applied to the student's account. Another example could be if a class was cancelled and unable to rescheduled and the school may want to credit a student's accounts. All of these incidentals could be made by using the Adjustment option.
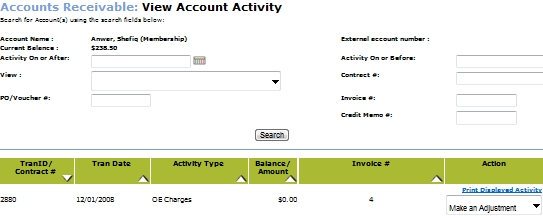
Select the Charges entry in the Activity Type field.
Select Make an Adjustment from the drop-down arrow in the Action field.
Not to be concerned about the Charge balance amount on this screen. This is not the adjustment amount. In this screen, Select one action as listed below.
Click Submit.
Fill in the Adjustment amount.
An optional feature is typing in a reason for the adjustment.
Click Submit.
There is more than one way to get you to the Invoice screen.
One way is to find the account on the View Activity screen and select Add an Invoice from the drop-down arrow in the Action field.
From the Accounts Receivable screen, type the name of the Company in the Account Name text box and click Invoices at the bottom of the page. For further instruction, go to A/R Management/Invoices in this user guide.