![]()
Note: In order for this function to perform optimally, the Document Editor needs to be installed.
Please see Appendix C Document Editor Setup Instructions in the user guide.
FINANCIAL MANAGEMENT | Credit Memo Templates |
Credit memos are created when an institution has obtained an overage of funds and uses a credit memo to return a portion of funds back to a company. A credit memo process is easier than creating a check request and having a check mailed to the company. Credit memos replace the constant need for issuing checks especially when large amount of transactions are feeding back and forth within an accounting system. A company usually has a balance or a continuum of financial exchanges where a credit memo adds to the efficiency of exchanging money. In order to issue a credit memo, a credit memo template has to be created first.
|
|
|
Note: In order for this function to perform optimally, the Document Editor needs to be installed. Please see Appendix C Document Editor Setup Instructions in the user guide. |
Once the Document Editor is installed, you will be able to create all your documents.
Click FINANCIAL MANAGEMENT, Credit Memo Template.
In the File Name text box, create a filename.
Once a document has been created, click the Save as Template button.

The purpose of creating documents in Credit Memo Template is to create a stand alone template that will not be linked to any other document.
|
The show and hide saved documents is a toggle link that allows you to see all the templates.

Stores all saved templates. This is an area where all proposal templates are stored and can be selected from here and opened.
0 = Original templates
# = (another number) Template create from another document.
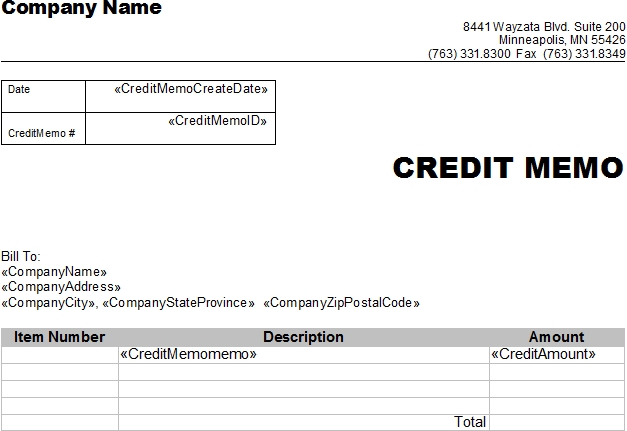
Create document template by either copying and pasting from existing MS Word Files or by typing text from scratch. Shown below is a sample invoice that can be created in the Document Editor. Notice the << >> symbols. These are merge field features which are highly recommended for an invoice template. Merge fields are place holders for specific information that separates one invoice from another.
Mail Merge features can be found:
Click on Mail Merge.
Click on Insert Merge Fields.
Click Save as Template.
The Merge Block feature enables fields that may contain multiple values to display all values for that field. For example, there may be multiple items on an invoice such as more than one student. Therefore, there would be multiple values for all fields associated with the student records. The feature will always be available where ever the Document Editor can be opened. The first step in applying this feature is to create a table. Though tables can be added for other purposes besides merge block, the details below are applicable only to the merge block feature.
From the Document Editor:
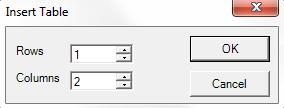
Click Table, Insert, Table and select one (1) row and however many columns your design requires.
The reason you want to choose one row verses two or more is because it will auto-populate according to the information.
The computer will do the work for you.
Once you have the table, you will want to place a field value in each cell.
Click Mail Merge.
Click Insert Merge Fields.
You can choose more than one field in a cell and increase the size of the cell by using the enter key on the
keyboard.
![]()
Select the whole table or all the contents in the table.
Click Mail Merge, Insert Merge Block.
You will get a pop-up dialog box when successful. There will be no other indicators that will tell you that the task has been completed.
To make changes to the table in Document Editor.
Select the template from the Show Saved Templates.
Click Mail Merge, Edit Merge Block.
Select the cell or table in which you want to delete.
Click on Table in the menubar, and click Delete Table or Delete Cell.
Underlying codes may exist if the contents in the cell is selected and deleted which may cause problems.